Tuesday, August 31, 2021

VIDEO TUTORIAL: SUMMER ATC


 Hello Oddballers! 


I´m Natalia (@la_maleta_encantada_scrap). Welcome to our blog!


I´ve made a SEWN ATC for you with the IMG 145 “ Digital Stamp Kawaii Kowai Zombie Icecream Eyes Scream Headache”.


You can find it on: 

KAWAII STAMP


Now, I bring you a quick tutorial with the step by step.


I hope you liked this creative project and I encourage you to create one and tag us on our social networks.


REMEMBER! You can use my code DTNAT1 if you would like to buy 2 

digital stamps and get 1 free on Oddballartco.com. And you can share

your projects with #creepycutechronicles on Instagram and on Facebook

and Wix group.


See you soon spookers!


Natalia 💜 


Web Oddball Art Stamps: https://www.oddballartco.com/


Visit me:

Instagram : https://www.instagram.com/la_maleta_encantada_scrap/

Facebook: https://m.facebook.com/lamaletaencantadascrap/?locale2=es_ES

Youtube: https://www.youtube.com/channel/UCqvaQgT5Lv0InriJeEhWYmA

Halloween profile: https://www.instagram.com/p/CA81owjnB7x/?igshid=wzxqj0bfxtmt  


Monday, August 30, 2021

Spooky Garden Flowers!


This is today's post for Oddball Art Co !

For this project I am using

Digital Stamp Creepy Cute Eyeball & Bones Flowers Spooky Garden Image No. 340

I have produced another journal page...

Step ONE

First I prepared a background.

After a layer of white gesso, I added colour using water colours, sprays and inks. The trees are stamped with black Archival using some unnamed stamps.


Step TWO

I printed the images and added colour with watercolours and black and white pens.


Step THREE

I cut out the various images.

Step FOUR

I then decided where I was going to place all the images and attached them with white glue.

Step FIVE

I added black distress around the edges and white coloured pencil round all the images.  The sentiment is one I had in my stash (from Karen Yates).

Finally I added more splatter.

You will see a similar post on my blog Calling All Crafters!


If you would like to buy any of Lizzy's Oddball images use my DT code: DTSUSAN10
This coupon code is for 10% OFF the entire Oddball Art Website


Sunday, August 29, 2021

Card "Octopus" by Roberta Cercato


Hello friends!
Today I created this card with one of Oddball Art's digital stamps, specifically I used Whimsical Steampunk Octopus Freddie "Legs" Wise-Key Image no. 250

To make the card I first printed the digital on cardboard suitable for use with alcohol markers and colored it with Spectrum Noir Classique.

To create the background I had a lot of fun!
It has been a while since I bought some Finnabair products and this time I wanted to dare a little more .... I really like the result!

First I passed a coat of white chalk, glued the gears and I ran black chalk.
Once dry, with a brush I applied various colors of Finnabair wax, green, orange and blue; finally I attached a few pieces of gold leaf here and there.

And here is a detail of my project


Did you like my card?
See you soon with another project!
Roberta


Saturday, August 28, 2021

Back to school


Hello!

I'm still in 'back to school' mode (my semester started this week) so I created this back to school card 😃

I used img 249 Whimsical Book Stacks and coloured the piles with alcohol markers. 
 
The background I did with stencil, Distress Inks and couple alphabet stamps. Back to school text is made with text editor and coloured with markers.

I also taped the image and back to school text with foam tape to create some dimension.

There is lots of books in this card, I really hope that I don't have to deal with that much information 😀


With this code DTMER1  
you can buy 2 digi stamps from
Oddball Stamps
and pay only one.
The more the merrier!


Happy crafting!


-Merja-

Friday, August 27, 2021

Sending you... sealy wishes!

Hello there

Like last week, today Friday I bring you a simple and quick tutorial on how to make your backgrounds with Oddball Stamps to make a super easy One Layer Card.


The result is this summery and so nice card.


The method to complete it is the same as that of last week's card. First of all, you must carry out a preliminary work on your computer, mounting the images in the position you want in an image and/or photography editing program. In my case, I used GIMP, a very complete and easy-to-use free software program. Remember to use the images in png format.


Then you just have to print your card and color it with the medium of your choice

Quick, easy and with perfect results.


I hope you like it and inspire and encourage you to make your own creations.


I remind you that you have the discount code DTIRENE10 for your purchases in the Oddball Stamps store and the hashtag #creepycutechronicles to share your work on the networks.

See you!

Sunday, August 22, 2021

Hello Pumpkin

 Hi crafty friends,

Halloween is around the corner and that means there are a lot of Pumpkins and Skeletons on my desk. You can call me Halloween obsessed. Current mood is Pumpkin spice, so I created a card with image CCC#68 TIS THE SEASON

https://www.oddballartco.com/product-page/ccc-68-tis-the-season-creepy-cute-chronicles

I printed the image and colored it the image with Copic Markers.

I used a book page from an old French book that I found in a thrift store and aged the edged with some black ink. Glued it onto black paper. Then I added a piece of black and white polkadot ribbon, a paper spider web and the round 31 (from Tim Holtz). 

Finally I added the quote "Hello Pumpkin" and some rhinestones, et voila. 


Happy crafting.


xxx Kelly xxx

Saturday, August 21, 2021

Fintastic!

Happy Saturday!


This time I wanted to do a something with a twist and this is what happened :)

I used IMG #476 Fortune Tellers Circus Magic Glass Ball & IMG #410 Whimsical Goldfish & Bubbles, assembled those with text editor and printed it. I coloured the image with alcohol markers and white gel pen. 
 
 I used Halloween 2018 Stay Creepy digi paper pack on the front and then I die cut an opening to a card base (I wanted to tape the image inside the card, so that there is little surprise). 
 
I also added die cut anchor and stamped New Job text.


And here's the inside part.

Fintastic is stamped and I doodled the frame.


With this code DTMER1  
you can buy 2 digi stamps from
Oddball Stamps
and pay only one.
The more the merrier!


Happy crafting!


-Merja-

Friday, August 20, 2021

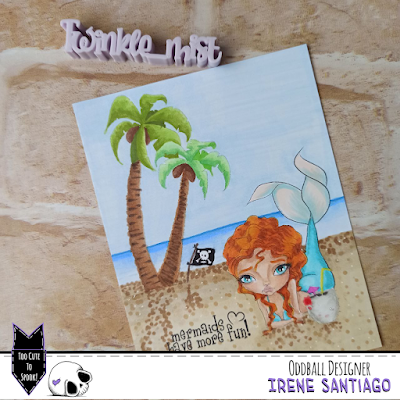
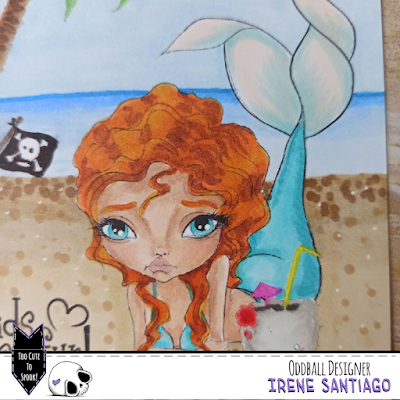
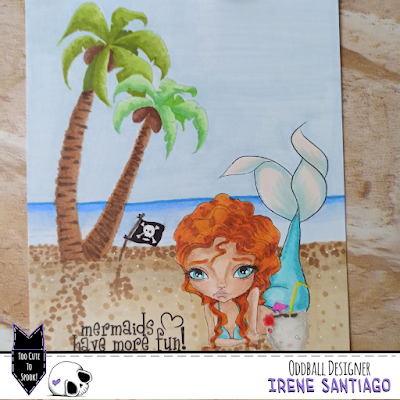
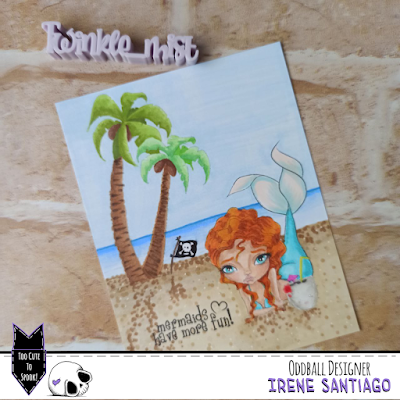
Mermaids have more fun!

Hi there!

Today's tutorial is on how to make a “one layer” card with your Oddball Stamps digital images.


Lately I have shown you several card designs with backgrounds drawn and colored by me, freehand. But if you do not feel safe and do not dare to try it on your own, you can make use of some digital stamps that would form a very simple background, but it turned out.


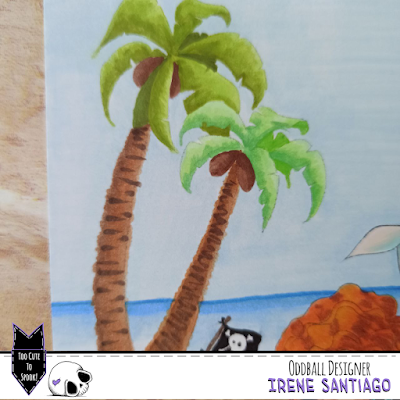
In the case of this card I have used the images #320 Mermaid Nixie Spirit of the Sea, #505 Creepy Cute Coconut and #507 Palm Trees, Flag & Sentiment Pirate Coves to create an island where to put the mermaid having a coconut soda while rests lying on the sand.

Doing it does not require much knowledge, just have a photo editing program installed and use the .png files that come in the .rar folders that you get when you buy the stamps.


I always use GIMP, a very easy-to-use free software with many utilities (very similar to Photoshop).

When you open your program, you can load the images or create a new document with the dimensions you want. I chose the size of a card. Then you simply upload your stamps, resize them and place them to the size and position in which you want them in your scene. To superimpose one on top of the other (as in the case of the coconut that is above the mermaid) or when loading the images, you do it in order from the furthest to the closest, or you reorder the layers of your file. When you have the basic scene (no horizon lines or any other details, just the stamps in the correct position and size), save your file in .png format


Then it is to follow the steps we normally take to print our digital stamps. Open a .doc, you don't need to resize since you saved it to the size of your card, and you print.

Once in paper format, you just have to color it with your favorite medium and you will get a finished panel ready to stick on your card base.

Super simple and quick to do.


I hope you like it and inspire and encourage you to make your own creations.

I remind you that you have the discount code DTIRENE10 for your purchases in the Oddball Stamps store and the hashtag #creepycutechronicles to share your work on the networks.

See you!